TensorFlow.js - Explore tensor operations through VGG16 preprocessing
text
Exploring Tensor Operations
What's up, guys? In this post, we're going to explore several tensor operations by preprocessing image data to be passed to a neural network running in our web app, so let's get to it.

Recall that last time, we developed our web app to accept an image, pass it to our TensorFlow.js model, and obtain a prediction.

For the time being, we're working with VGG16 as our model, and in the previous post, we temporarily skipped over the image preprocessing that needed to be done for VGG16. We're going to pick up with that now.
We're going to get exposure to what specific preprocessing needs to be done for VGG16, yes, but perhaps more importantly, we'll get exposure to working with and operating on tensors. We'll be further exploring the TensorFlow.js library in order to do these tensor operations.
Let's get into the code!
We're back inside of our predict.js file, and we're going to insert the VGG16 preprocessing code right within the handler for the click() event on the
predict-button.
let image = $("#selected-image").get(0);
let tensor = tf.browser.fromPixels(image)
    .resizeNearestNeighbor([224, 224])
    .toFloat();
We're getting the image in the same way we covered last time, converting it into a tensor object using tf.browser.fromPixels(), resizing it to the appropriate 224 x 224 dimensions,
and casting the type of the tensor to float32. No change here so far.
Alright, now let's discuss the preprocessing that needs to be done for VGG16.
How to preprocess images for VGG16
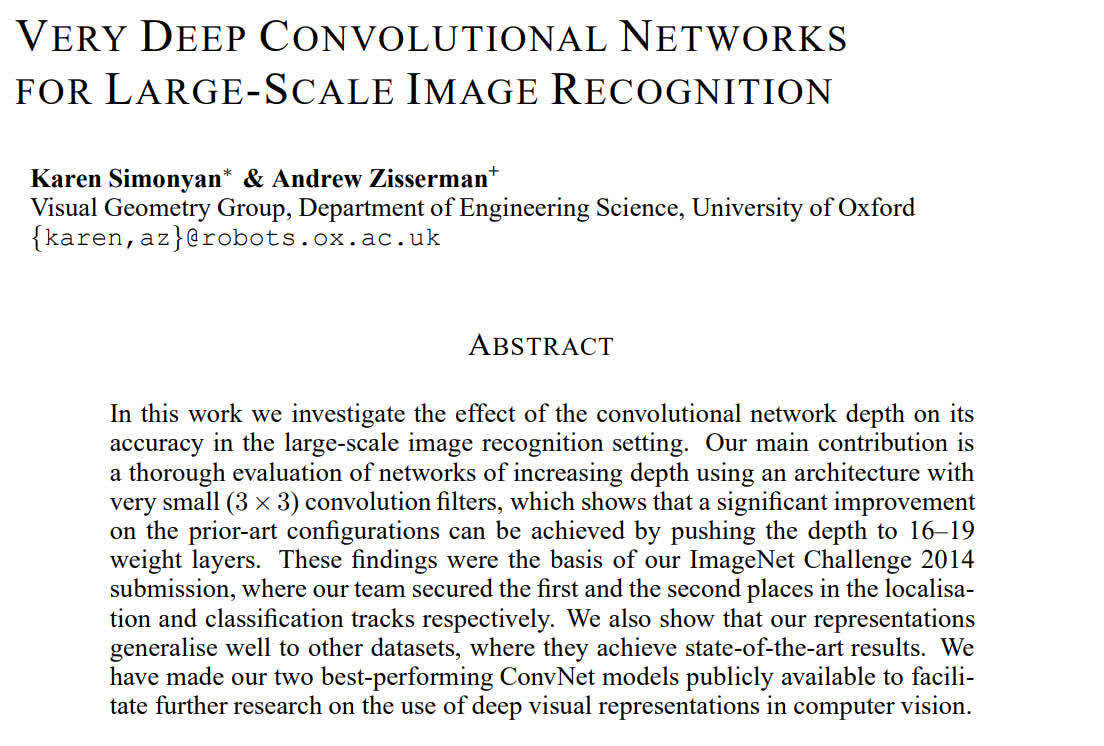
This paper, authored by the creators of VGG16, discusses the details, architecture, and findings of this model. We're interested in finding out what preprocessing they did on the image data.

Jumping to the Architecture section of the paper, the authors state,
computed on the training set, from each pixel.”
Let's break this down a bit.
We know that ImageNet was the training set for VGG16, so ImageNet is the dataset from which the mean RGB values are calculated.
To do this calculation for a single color channel, say red, we compute the average red value of all the pixels across every ImageNet image. The same goes for the other two color channels, green and blue.
Then, to preprocess each image, we subtract the mean red value from the original red value in each pixel. We do the same for the green and blue values as well.
This technique is called zero centering because it forces the mean of the given dataset to be zero. So, we're zero centering each color channel with respect to the ImageNet dataset.
Now, aside from zero centering the data, we also have one more preprocessing step not mentioned here.
The authors trained VGG16 using the Caffe library, which uses a BGR color scheme for reading images, rather than RGB. So, as a second preprocessing step, we need to reverse the order of each pixel from RGB to BGR.
Alright, now that we know what we need to do, let's jump back to the code and implement it.
Writing the preprocessing code
We first define a JavaScript object, meanImageNetRGB, which contains the mean red, green, and blue values from ImageNet.
let meanImageNetRGB = {
    red: 123.68,
    green: 116.779,
    blue: 103.939
};
We then define this list we're calling indices. The name will make sense a moment.
let indices = [
    tf.tensor1d([0], "int32"),
    tf.tensor1d([1], "int32"),
    tf.tensor1d([2], "int32")
];
This list is made up of one dimensional tensors of integers created with tf.tensor1d(). The first tensor in the list contains the single value, zero, the second tensor contains the single value,
one, and the third tensor contains the singe value, two.
We'll be making use of these tensors in the next step.
Centering the RGB values
Here, we have this JavaScript object we're calling centeredRGB, which contains the centered red, green, and blue values for each pixel in our selected image. Let's explore how
we're doing this centering.
let centeredRGB = {
    red: tf.gather(tensor, indices[0], 2)
        .sub(tf.scalar(meanImageNetRGB.red))
        .reshape([50176]),
    green: tf.gather(tensor, indices[1], 2)
        .sub(tf.scalar(meanImageNetRGB.green))
        .reshape([50176]),
    blue: tf.gather(tensor, indices[2], 2)
        .sub(tf.scalar(meanImageNetRGB.blue))
        .reshape([50176])
};
Recall we have our image data organized now into a 224 x 224 x 3 Tensor object. So, to get the centered red values for each pixel in our tensor, we first use the TensorFlow.js function
tf.gather() to gather all of the red values from the tensor.
Specifically, tf.gather() is gathering each value from the zeroth index along the tensor's second axis. Each element along the second axis of our 224 x 224 x 3 tensor represents
a pixel containing a red, green, and blue value, in that order, so the zeroth index in each of these pixels is the red value of the pixel.
After gathering all the red values, we need to center them by subtracting the mean ImageNet red value from each red value in our tensor.
To do this, we use the TensorFlow.js sub() function, which will subtract the value passed to it from each red value in the tensor. It will then return a new tensor with those results.
The value we're passing to sub() is the mean red value from our meanImageNetRGB object, but we're first transforming this raw value into a scalar by using the
tf.scalar() function.
Alright, so now we've centered all the red values, but at this point, the tensor we've created that contains all these red values is of shape 224 x 224 x 1. We want to reshape
this tensor to just be a one dimensional tensor containing all 50,176 red values, so we do that by specifying this shape to the reshape() function.
Great, now we have a one dimensional tensor containing all the centered red values from every pixel in our original tensor.
We need go through this same process now again to get the centered green and blue values. At a brief glance, you can see the code is almost exactly the same as what we went through for the red values. The only exceptions are the indices we're passing
to tf.gather() and the mean ImageNet values we're passing to tf.scalar().
At this point, we now have this centeredRGB object that contains a one dimensional tensor of centered red values, a one dimensional tensor of centered green values, and a one dimensional tensor
of centered blue values.
Stacking, reversing, and reshaping
We now need to create another Tensor object that brings all of these individual red, green, and blue tensors together into a 224 x 224 x 3 tensor. This will be the preprocessed
image.
let processedTensor = tf.stack([
    centeredRGB.red, centeredRGB.green, centeredRGB.blue
], 1)
    .reshape([224, 224, 3])
    .reverse(2)
    .expandDims();
We create this processedTensor by stacking the centered red, centered green, and centered blue tensors along axis 1. The shape of this new tensor is going to be of 50,176 x 3. This
tensor represents 50,176 pixels each containing a red, green, and blue value. We need to reshape this tensor to be in the form the model needs, 224 x 224 x 3.
Now, remember at the start, we said that we'll need to reverse the order of the color channels of the image from RGB to BGR. So we do that using the TensorFlow.js function reverse() to
reverse our tensor along the specified axis, which in our case, is axis 2.
Lastly, we expand the dimensions to transform the tensor from rank-3 to rank-4 since that's what the model expects.
Whew! We now have our preprocessed image data in the form of this processedTensor object, so we can pass this preprocessed image to our model to get a prediction.
A note about broadcasting
Note that we handled these tensor operations in a specific way and a specific order to preprocess the image. It's important to know, though, that this isn't the only way we could have achieved this.
In fact, there is a much simpler way, through a process called broadcasting, that could achieve the same processed tensor at the end.
Don't worry, we're going to be covering broadcasting in a future video, but I thought that, for now, doing these kind of exhaustive tensor operations would be a good opportunity for us to explore the TensorFlow.js API further and get more comfortable with tensors in general.
Testing the app
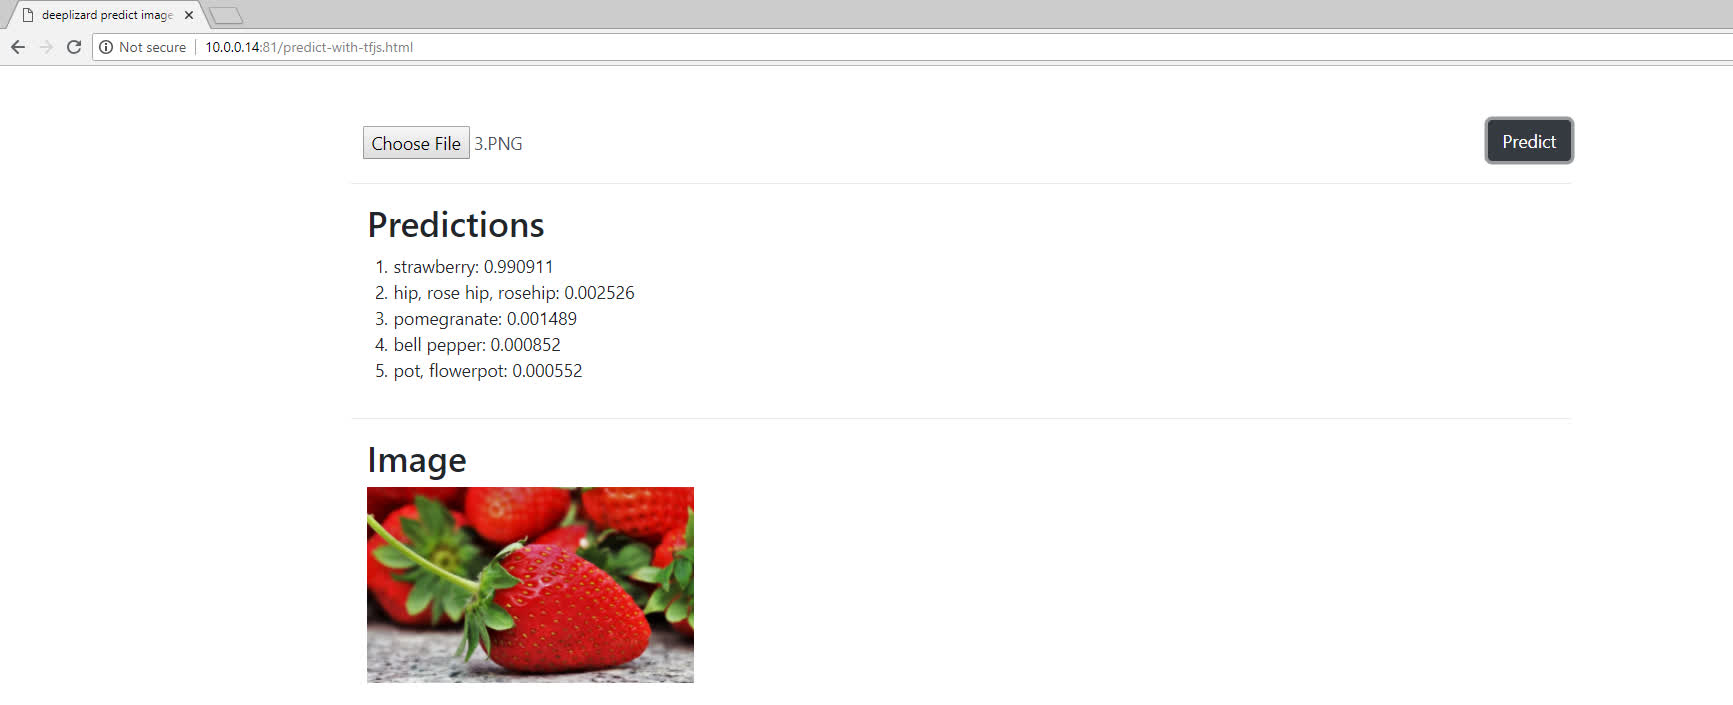
Checking out our app, using the same image as last time, we can now see that the model gives us an accurate prediction on the image since the image has now been processed appropriately.

Now, I don't know about you, but tensor operations like the ones we worked with here are always a lot easier for me to grasp when I can visualize what the tensor looks like before and after the transformation. So, in the next video, we're going to step through this code using the debugger to visualize each tensor transformation that occurs during preprocessing.
Let me know in the comments how processed your brain is after this video, and I'll see ya in the next one!
quiz
resources
updates
Committed by on


 DEEPLIZARD
Message